
XRDS: Resources for Students
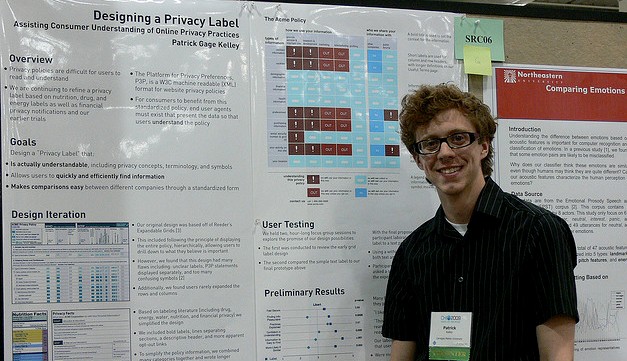
Photo by anikarenina, Flickr.
This article originally appeared in this magazine in 1996, and was updated in 2010 by Anirvana Mishra.
How to Write a Research Poster
By Lorrie Faith Cranor
Poster sessions at conferences and university research fairs provide excellent opportunities for students to show off their work and to discuss their research in an informal setting. While it is important to present good work at a poster session, even the most outstanding research projects will receive little attention if they are not presented well. This article provides a guide to creating and presenting an attractive and informative research poster.
Content
The most important part of your poster is the content. Before you start planning your poster design, decide on the content you wish to present. Students often make the mistake of trying to present an entire thesis or journal article on a poster. Don't try this approach. People do not have the time or patience to read a lengthy report at a poster session. Your poster should be an abstract that advertises your work. If your audience likes the poster, they can request a copy of your whole thesis or paper to read when they get home. You might provide copies of your paper next to your poster or pass out flyers with information on how to get your paper electronically, but don't put the whole paper on your poster.
Given that you have limited space, you must decide what aspects of your research are most important to present. This depends a lot on your audience. If you are presenting your poster to a general audience you will need to provide a lot of background information and emphasize the applications of your research. If your audience already understands and appreciates your research area, you should focus on your unique contributions and emphasize your results (if you have any -- some poster sessions allow students to display research in progress).
Regardless of what you decide to emphasize, make sure your poster includes a clear and succinct statement of your research problem, a brief description of your approach, and summary of any results you have obtained to date. The organizers of the poster session might also supply a list of items that your poster should include.
Create an outline of the content you plan to present. Then fill in each section of the outline with short paragraphs and bulleted or numbered lists. Do not include lengthy paragraphs on your poster. Unless you will be presenting to a very technical audience, avoid complicated equations and code fragments of more than a few lines. Depending on the size of your poster and the number of graphics you include you will generally have room for somewhere between 500 and 1500 words. If your initial draft is longer than that, reduce the number of words before you start working on the poster design.
Overall Design
Before you begin designing, determine the overall size and shape for your poster. Find out whether your poster session has any size limits that you must adhere to. Also find out whether you are expected to present a free standing poster or whether you will be given a board on which you can attach the various components of your poster. Even if you will be given a board, you may still wish to mount all of your poster components on one or several large panels. This tends to give your poster a more unified look and it will be easier for you to assemble and disable your poster quickly at the poster session.
Regardless of whether you design your poster in panels or small components, you should divide your content into modular components, each of which will be placed in its own ``box''. Boxes can be created by printing rectangles around each component or mounting the components on sheets of colored construction paper. If you design your poster in panels you can easily group boxes together, placing several small boxes in one larger box. This allows you to visually group related elements. If you design your poster in small components you can use color, position, or even lines made of string to visually group related elements on the board.
You should also arrange your poster elements so that there is a sensible visual flow -- left to right or top to bottom, for example. If you have multiple columns or rows of elements it is sometimes helpful to number elements with bold numerals or use arrows to mark the suggested flow.
Software
The right software can simplify your poster preparation process tremendously. If you plan to create your poster in one or several large panels, I highly recommend the use of a desktop publishing package such as Adobe Indesign, Adobe PageMake, QuarkXpress, Adobe FrameMaker, Corel Ventura or CorelDraw. These packages will allow you to design your poster in modular boxes of varying sizes that you can easily reposition. You can then print each panel as one large sheet on a large-format plotter, print it in tiles on a standard printer, or print it at a reduced percentage on a standard printer and enlarge it on a large-format copier. If you don't have a desktop publishing package and can't find one in any of your school's computer labs, a word-processor like Openoffice, drawing package like paint and GIMP, or even LaTeX will do. If you use one of these packages it is generally easiest to use uniformly sized boxes that each fit on the largest sized paper that you can use in your printer. Slide preparation programs such as Microsoft PowerPoint and OpenOffice.org Impress can be great tools for creating uniformly sized elements with consistent fonts and borders.
Presenting Text
When designing your poster you should focus on creating a design that can be read quickly and places visual emphasis on the most important parts. The first step for achieving these goals is to select one or two easy-to-read fonts. Your text should be set in a large font -- 16 pt minimum, 30 to 60 pt preferred. Select a larger, bold font for headings (possibly in multiple sizes if you have more than one level of headings). Select a smaller font for details and footnotes that are not essential to understanding your research but may be of interest to some readers.
Your text should be presented in such a way that someone who does not want to spend a lot of time reading your poster can get a quick overview. Whenever possible, present text as bulleted or numbered lists. Use a bold font or an alternate color to emphasize the most important bits of text. Place details in a smaller font below the main points or in separate boxes off to the side.
Finally, don't forget to spell check and proof read your text!
Presenting Graphics
As the old saying goes, a picture's worth a thousand words. Graphics can be excellent tools for explaining procedures, describing equipment, or summarizing results. Use graphs, flow-charts, photographs, and diagrams to illustrate your poster. Not only will they add visual interest, but they will allow people to gain a quick understanding of your work without reading lengthy paragraphs of text.
Depending on the software you use to create your poster, you may be able to use the same software to create graphics. Some software also allows you to import graphics from drawing or graphing programs. But if this is difficult or impossible to do with your software, don't hesitate to physically cut and paste graphics onto your poster.
Using Color
Color is an excellent tool for brightening up your poster, visually grouping elements, and drawing attention to the most important elements. It can also make graphs and diagrams easier to read and understand. However, color should be used carefully and with purpose. It should not be randomly applied just for the sake of having color. Unless you are experienced with using color, select a palette of one to four colors and use them consistently throughout your poster.
If you have access to a good color printer, consider designing your entire poster in color. Select a dark color such as black or deep blue for your main text. Select a bright color such as red or magenta for important text. You might also want to use a contrasting color for headings and bullets. You can make entire elements stand out or identify them as part of a group by filling them with a light-colored background or surrounding them with a brightly colored border. You might use color to visually distinguish each section of your poster (for example, problem, background, approach, and results) or to indicate the importance of each item.
Even if you do not have a color printer, there is plenty you can do with color. The simplest way to add color to your poster is to mount each of the modular components on a sheet of colored construction paper. But be consistent with your colors: do not buy a package of assorted colors and use one of each color. You can also print your headings in an outlined font and color them in with bright colored markers. Use the markers to shade bar graphs and diagrams in matching colors.
Printing Your Poster
If you are fortunate enough to have a large-format color plotter at your university, ask if you can use it for your poster. These plotters are often found in electrical engineering departments and architecture schools. They can be used to print panels measuring approximately 2 feet by 3 feet on one sheet of paper. Some copy shops and desktop publishing companies charge by the foot for printing on their large plotters, but the fees are often prohibitively expensive on a student budget.
If you want to print each panel on a single sheet but don't have a large plotter, you can print the panels on the largest paper your printer takes and have it enlarged at a local copy shop. Another option is to print each panel in tiles and carefully tape them together.
But large panels are not essential to a successful poster. Items printed on standard laser printer paper (8 1/2 x 11, 8 1/2 x 14, etc.) can look great when mounted on construction paper.
Putting Your Poster Together
If fabric-covered boards will be available at your poster session, use velcro to attach your poster to the boards. Office supply stores, art supply stores, hardware stores, and perhaps even your university book store sell adhesive-backed velcro strips that you can stick to the back of your poster. Use one strip on the back of each small component or, for a large panel, place a strip at each corner. Make sure you use the rough part of the velcro -- the soft part won't stick to the fabric board. If you're not sure whether the surface of the board will be suitable for velcro, bring push pins along just in case. It also doesn't hurt to bring along a roll of masking tape in case neither velcro nor push pins will work with the board, and a roll of clear tape for repairing any damage that occurs during travel. You might also consider laminating your components to make them stronger.
If your poster must be free standing or will be presented on an easel, mount your components or panels on foam core board. This board is generally available at art supply stores and sometimes at college book stores. It is about one-quarter inch thick with a glossy paper front and back and a foam center. Rather than gluing your components to the board, I recommend using flat, colored thumb tacks. Select a color that matches one of the colors you used in your poster or use plain white or black. Tacks are a lot easier to deal with than glue and allow your foam core board to be easily reused.
Free standing boards can be created by hinging two or three foam core panels together with strong tape or by taping a foam core or cardboard strut to the back of a single foam core panel.
However you decide to assemble your poster, do it neatly. If you must cut things out of paper, draw guidelines for yourself with a ruler and cut carefully along the lines. If you must tape things, make sure the tape is not visible on the front of your poster; use double-sided tape if necessary. Use glue sparingly, and test it on a small corner of the paper you are using before applying to large areas. Craft glue can often cause thin paper to wrinkle. Rubber cement sometimes melts ink, especially the wax ink used in some color laser printers. Glue sticks usually work well for attaching white paper to construction paper.
Finally, if you are taking your poster to a conference, pack it so that it will not get damaged in transit. Large panels printed on paper can be rolled and transported in a mailing tube. Foam core boards should be placed in a large cardboard carrier. These carriers are often available for free or at a low price from the stores that sell foam core. If you can't find one, sandwich your foam core boards between two large sheets of corrugated cardboard and place tape around all the sides.
Presenting Your Poster
Go to the poster session ready to talk to a lot of people. Not only is this a good opportunity for you to tell people about your work, but it is also a good opportunity for you to get new ideas that might improve your work. So if people seem interested in what you are doing, engage them in conversation. A poster forum I presented at a few months before I began interviewing for a job was good practice for answering the types of questions I got asked about my research while interviewing.
It's also a good idea to think ahead of time about some of the questions you might get asked. This is especially important if you are presenting a small component of a large group research project. You should have a working knowledge of the whole project and be able to answer questions about the project in general. If you don't think you can do that, talk with the other members of your research group to get a better understanding of the rest of the project. You should also have some knowledge of similar research projects and how your project differs from them. A frequent question people ask about research is how it differs from similar work, so be prepared with an answer.
About the Author
Lorrie Faith Cranor is a professor at Carnegie Mellon University and one of the original editors of this magazine, serving as editor-in-chief from 1994-1996.
Student prices for software needed to create a dynamite research poster. All prices are given in USD. For more information please the follow the links.
- Adobe Indesign $199
- Adobe PageMake $289
- QuarkXPress $199
- Adobe FrameMaker $399
- CorelDRAW $99
- Microsoft PowerPoint $79.95, and comes as part of Microsoft Professional Academic 2010, which includes other Microsoft Office tools, too
And don't forget about the free open-source options that are widely available for download:
- LaTeX (Publishing and text-setting tool)
- GIMP (a Photoshop substitute)
- OpenOffice (a Microsoft Office substitute)